Written on 27th June, 2022 | 4 min read
Content Marketing Workflow Automation with Airtable, Google Drive and Zapier
How I use these tools to automate steps in the content lifecycle
Andreea Macoveiciuc
Strategist @School of Content
.jpg?u=https%3A%2F%2Fimages.ctfassets.net%2Fwqg266fbc5en%2F71KUUxGmo2b66nxYsmmQOt%2F877753a4398d3be12492a7b3532ec27d%2FSocial_post_-_blog__5_.jpg&a=w%3D1200%26h%3D630%26fm%3Djpg%26q%3D75&cd=2022-06-28T07%3A49%3A32.984Z)
The goal of this article is to show you some simple ways to automate steps in the content lifecycle using Google Drive, Airtable and Zapier.
In this instance, I’m using Drive to store the outlines and create the drafts, Airtable as a content calendar, and Zapier to integrate the tools and automate some processes. Some steps are using Airtable automations.
Notes:
I’ve written about the content lifecycle stages before, so I won’t explain again what the content lifecycle is or what the typical stages are. If you’re completely new to this topic, please review this article first:
Managing the content lifecycle
Airtable automations are only available on a paid plan.
Prerequisites
Ideation & keyword research
Before you automate the content creation process, you need a list of topics to write about, as well as the main keyword you’ll target in each article.
Tools
For this example I use paid plans, but Zapier allows you to create a couple of Zaps on the free account as well. For Airtable, automations are only available on a paid plan.
Google Drive is free to use. I only use Drive to store the outlines for writers. The writing itself happens in Clearscope (paid tool), as it’s easier to optimize the content directly. Also, it prevents outlines from being altered, which can happen when working with external writers.
Of course, you can always replace Clearscope with your tool of choice, or keep the drafts in Drive as well. But my recommendation is to have two separate files for the outline and the draft, for the reason stated above.
For the keyword research part, including keyword volume and difficulty, I use Ahrefs.
Set up your content calendar in Airtable
I use Airtable for the idea backlog and content calendar. You can see the example table used in this article here.

Image: Airtable view content calendar
I use the following fields:
Title — This is the article’s working title
Status —Single select field, with the options To do, Waiting for input (if you create content that requires input from SMEs), Sent to writer, In progress, Done, Ready for publishing, Published, To optimize, With partner (if you co-author content with partners).
Writer
Deadline
Publish date
Topic — Multiple select field, with your main content categories
Keyword — One main keyword to target in each article
KW volume — From Ahrefs
KW difficulty — From Ahrefs
Slug — The article’s URL
Angle — The article’s main idea and angle to take. This helps writers to know the difficulty and knowledge levels we aim for, as well as what to avoid.
Outline link — This is the link to the GDrive document. Leave it empty in the beginning, as it will be created by the Zapier automation.
Clearscope draft — This is the link to the Clearscope report where the writer will create the actual content.
lastModifiedTime — This field is needed for the automation part.
Step 1: Automate the outline doc creation process
The first step we’ll automate is the creation of the outline documents in Google Drive.
Once you have the fields populated in the content calendar, you can let Zapier create the outlines for you, instead of having to manually create each document and copy-paste the info from the calendar table.
Before running the automation, you’ll need to create a Zapier account and click to create a first Zap. You’ll be asked what your data source is. Choose Airtable, as that’s where input data will come from initially.
Automation overview
This automation will do 3 things:
Check for new records in the content calendar that have a Clearscope link attached.
We do this, instead of triggering a new document for every title/idea added to the calendar, because we want to create outlines only for documents that are ready to be sent to the writers.
For each article idea / title in Airtable, create a new outline document in Drive that contains all the data from the content calendar.
Update the content calendar record with the Google Drive outline link.
Here’s the automation setup:
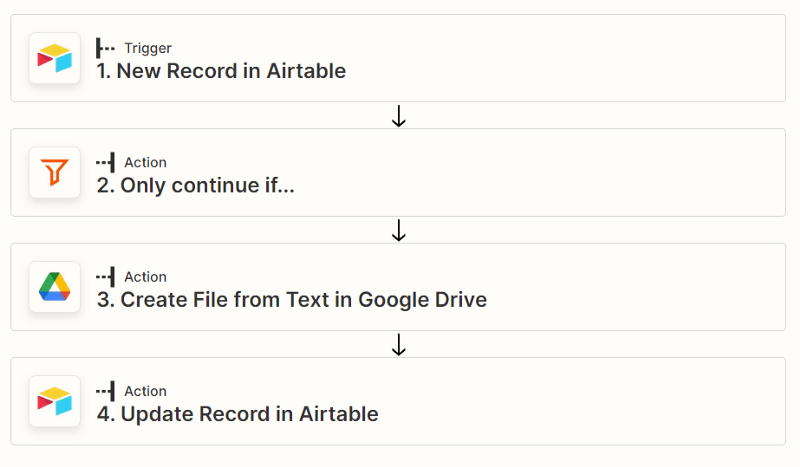
Image: Outline doc creation process - Automation in Zapier
Steps are as follows:
Trigger: New record in Airtable -> When a new record is added to the Airtable content calendar
Action (Filter): Only continue if -> The record’s “Clearscope draft” cell is not empty
Action: Create file from text in Google Drive -> If there are new records that meet the criteria in step 2, it creates a new outline doc in Drive
Action: Update record in Airtable -> It updates the “Outline link” cell in the Airtable calendar, so that we don’t have to go back and forth to Drive to find the outline doc
Steps setup
Trigger
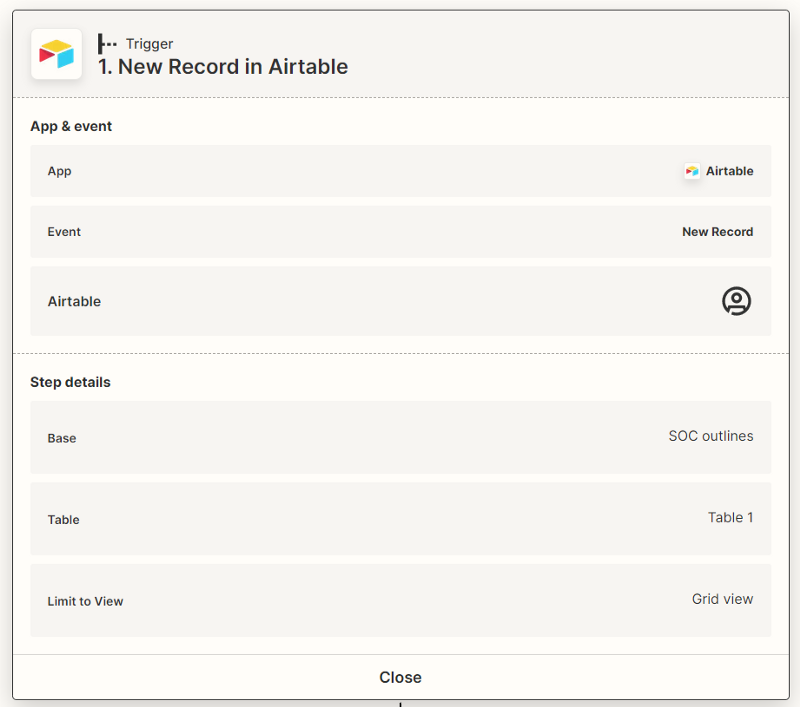
Image: Trigger setup in Zapier
2. Filter (check conditions)
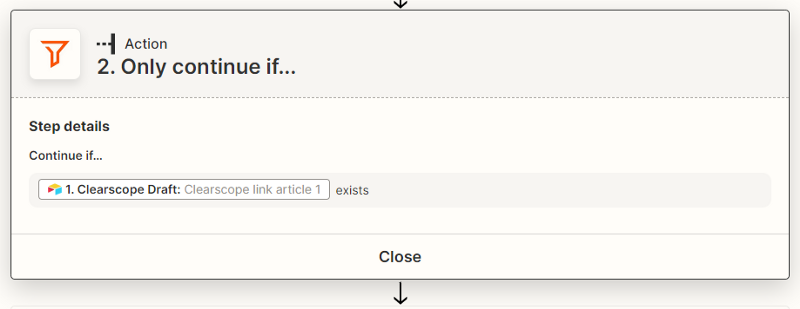
Image: Filter setup in Zapier
3. Create outline doc in Drive
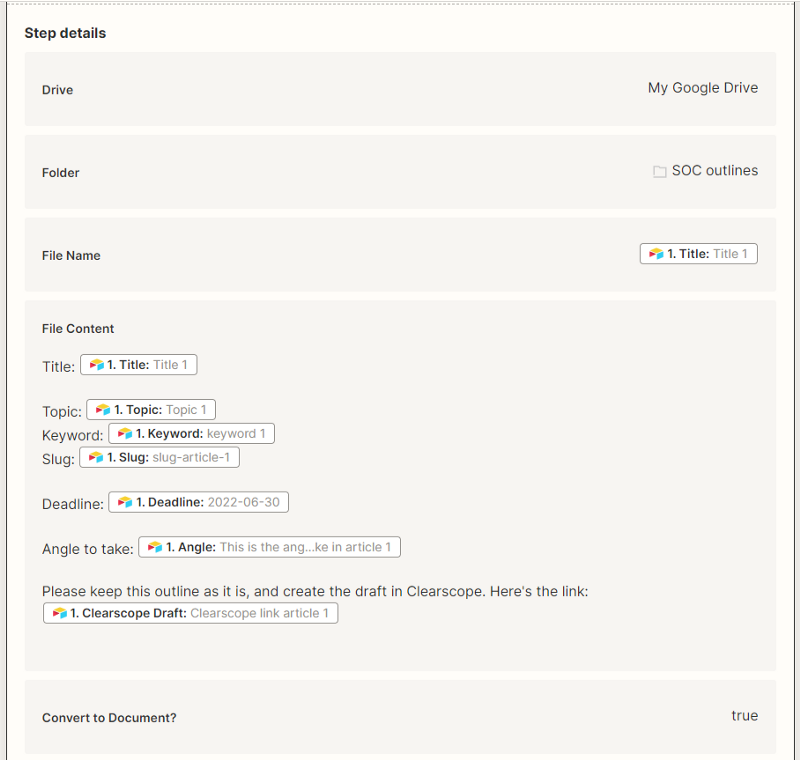
Image: Outline part 2
4. Update record in Airtable

Image: Update record
Step 2: Detail each outline in Google Drive
Once the outline docs are ready, the next step is to detail each outline in the Google document.
I don’t add the outline itself in Airtable, as I find it better to set some time aside to focus on outlines only. This ensures the content is on topic and I don’t forget to mention things that are important.
To create the actual outlines / content briefs, I work directly in the Google docs, and usually reserve a full day for this.
Step 3: Send notifications to writers when outlines are ready
Next, once the outline docs are ready, and the outlines are detailed in each document, writers can start creating the drafts in Clearscope.
We want to automate this step as well and notify each writer that they can start the work. To do this, I’ll add a new column to the Airtable calendar, for Writer email, and then I’ll set up an automation in Airtable.
We’ll trigger this email when the status of the article changes from “To do” to “Sent to writer”. This is a manual step, and I prefer to keep it like this, just to make sure that I double-check all the docs before sending the emails.
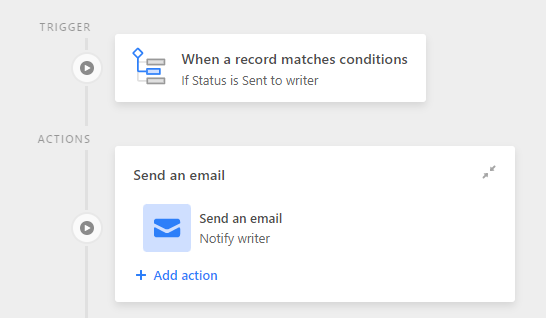
Image: Email notification
First, the setup — this automation will do two things:
Check if the status of any article is “Sent to writer”
If it is, send the notification
Here’s the automation setup:
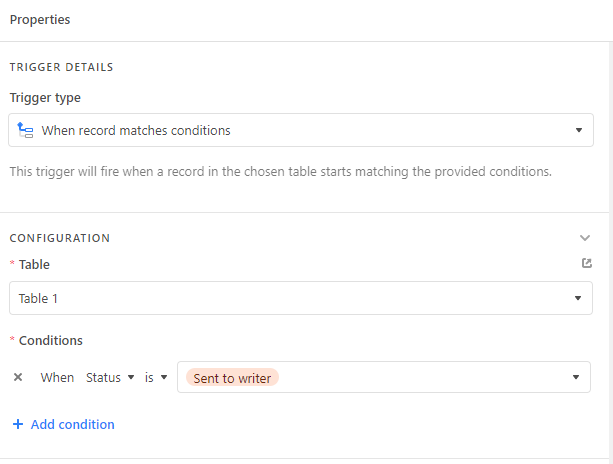
Image: Trigger step 1
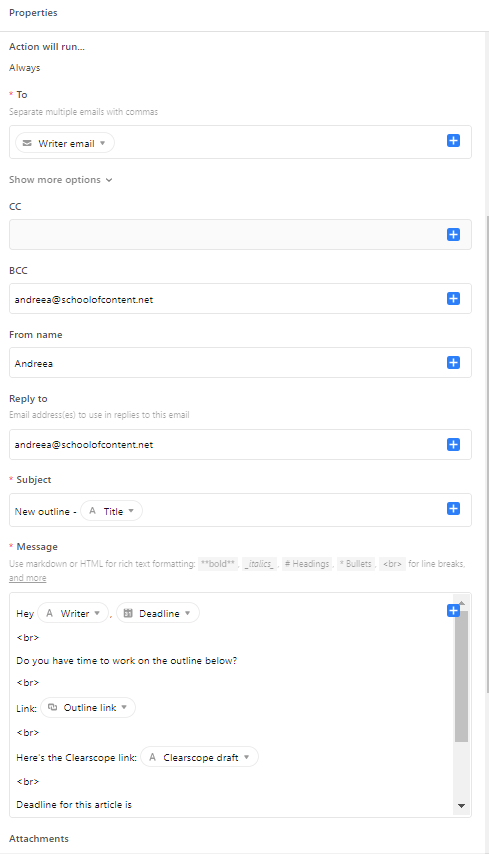
Image: Email setup
That's it. Here's the email that was sent through this workflow:
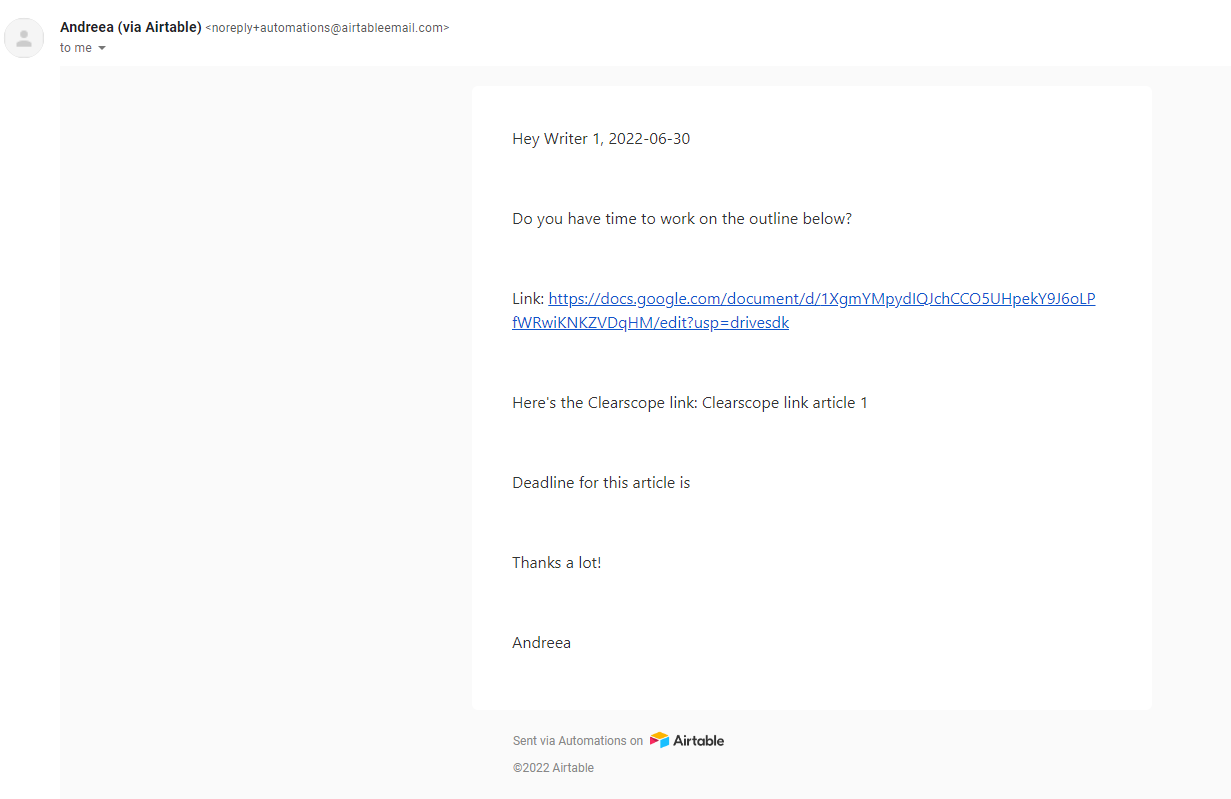
Image: Email sent
I hope this was useful. If you need help with your content workflows or strategy, get in touch.